How To Become A Web Designer In 2024

Step one choose your niche.
The people that you want to serve and can help the most are going to know that you understand their business their frustrations and their fears and will respond to your helping them better than simply offering your services to everyone.
Step 2 choose your platform.
Over 70% of the websites online use WordPress. This is an open source, platform that is very professional and secure. You’ll need to learn how to create and edit websites using WordPress, but I’ve got you covered! I created a complete WordPress video series that you can access for free here.
![]()
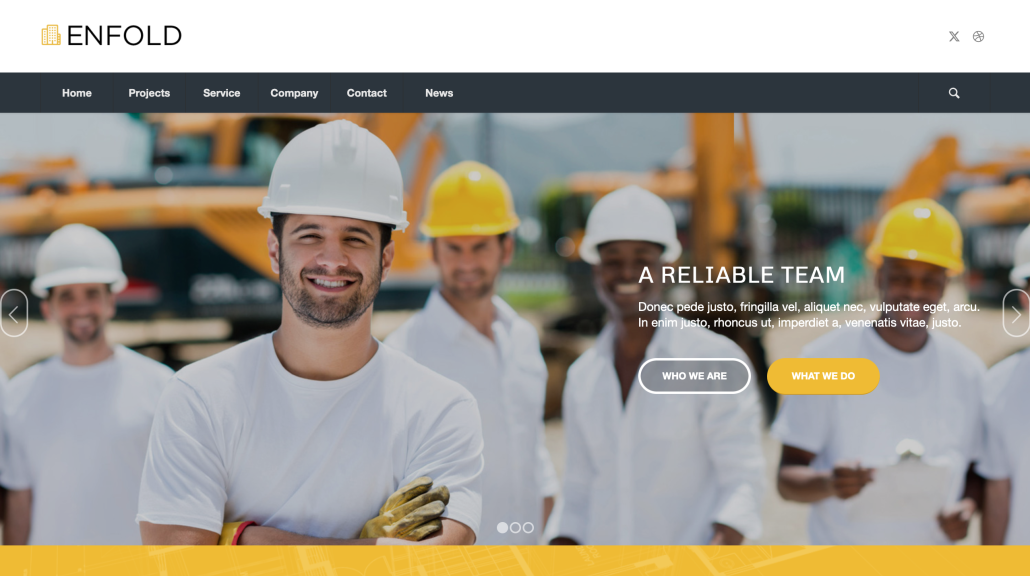
Step 3 choose your theme.
Your theme is going to determine the overall feel and look of your new website. The theme that I recommend is Enfold, it’s normally $59, but you can get a copy for free here including some premium plugins I already included for you.
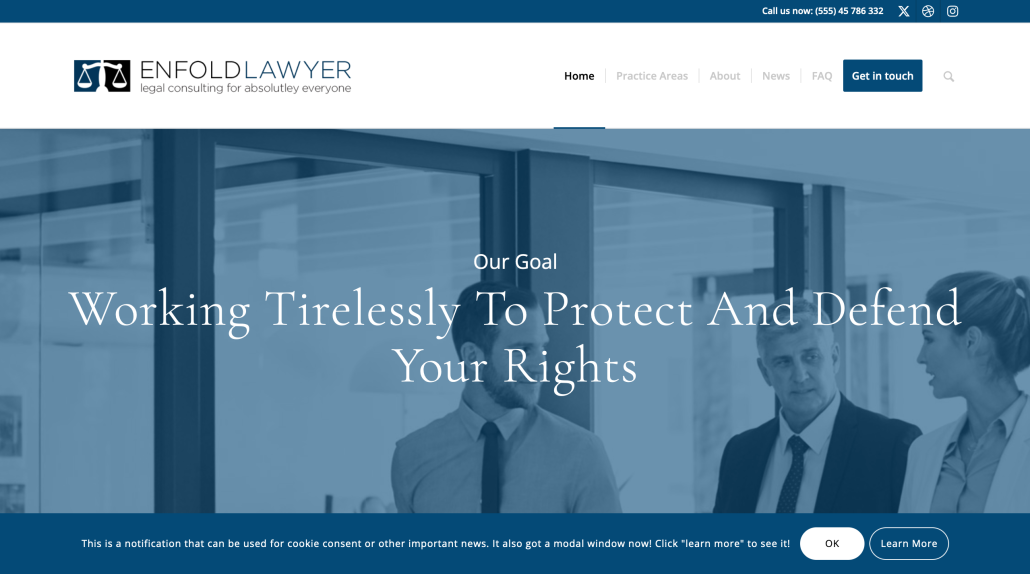
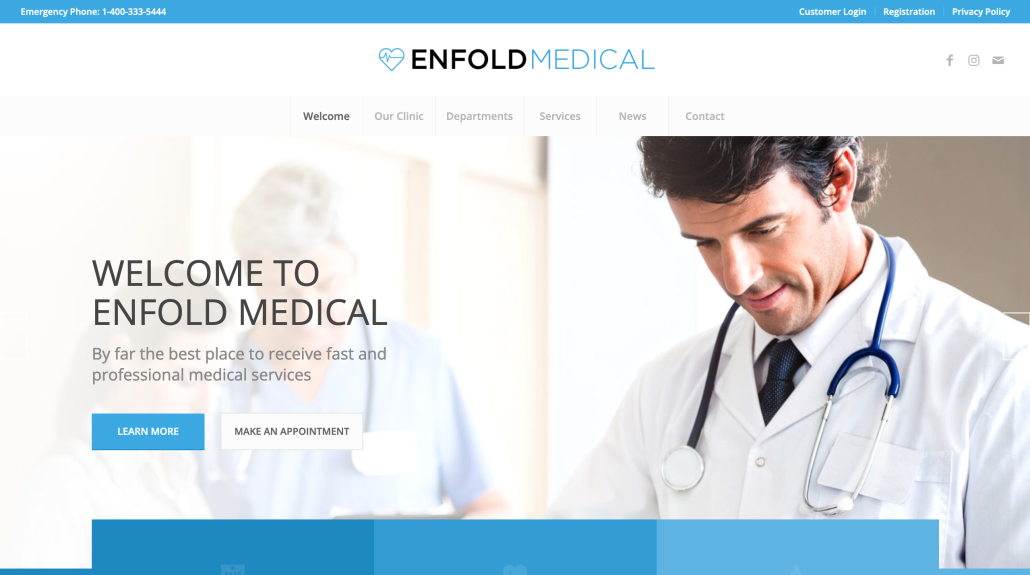
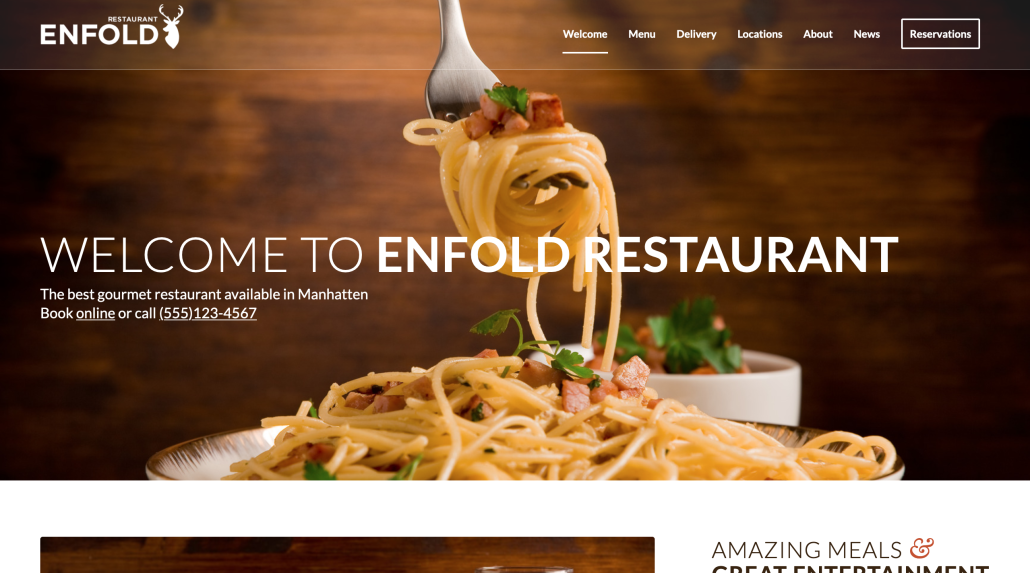
Step 4 Create Your Portfolio.
For your portfolio you can create demo websites in order to show people what their website can look like if they work with you. I would start with between 3 and 6 demo websites which you can create very easily with the Demo Import feature in Enfold. (Also 100% free!)

Step 5 Set Up Your Server.
Your server is going to be where all of your website files are hosted. You can get cheap individual hosting that is not secure or reliable, but you definitely don’t want to do that as a web designer because your reputation and your clients reputation will be at risk. However the hosting that I recommend and have used for over two decades is actually very affordable. It’s about $20 per month for unlimited websites.
Step 6 Give Away A Few Websites.
When you’re first getting started you don’t have the reputation or proof that you can do a good job, you’re going to sacrifice some of your time and effort by giving away a few websites to a few lucky local business owners. You will still make money on the hosting and if they want they can give you a tip when you’re done. This removes the risk for them and takes the pressure off of you when selling, by simply being upfront and saying that you’re new to web design. Keep in mind you can show them the quality of the websites that you can create with your portfolio that you created earlier with the Demo Import feature.
Step 7 Buy Your Domain.
You’ll want to buy a domain from namecheap.com that is easy to spell, easy to remember and related to your niche. So for example you may want to buy something like www.southbeachdentalwebdesign.com or www.hamptonhvacwebservices.com. Whenever possible buy a dot com. If you see a great name that’s a dot net, that’s ok, but dot com should always be your first choice. Stay away from any other extension for your business website.
Step 8 Set Up Payments.
You can start collecting payments with Venmo or PayPal to keep things simple (both free to set up), but I’d recommend using ThriveCart once you’ve made some money to give a more professional experience to your clients. It’s may be too expensive to set up initially, but you get lifetime access with unlimited products for $500.
The key to collecting payments for web design is to get a 50% retainer up front and then the balance in 30 days. The reason why it’s important to say retainer versus deposit is that the retainer is non-refundable when you create a website for a client if you have all of the information that you need, be able to complete their website in a day or two.
However you don’t want to turn it in in a day or two or even let them know that it will only take you that amount of time, because they will see it as less valuable when you complete it that quickly and won’t want to spend as much money with you.
Keep in mind clients are normally busy and actually don’t know what they should add to the website, will be some back and forth time in order to get the content that you need for their website like pictures, company information, contact details, etc.
Step 9 Set Yourself Up For Success!
When your first talking about creating a website for somebody that’s interested, you want to let them know that they’re either going to get the website for free, and only pay for their hosting, or if you’ve done a few websites you can do their website for a very low price like $500 versus the normal price of $1,500.
One of the ways that you justify the logic of charging less is that you’re getting started and you need their help with reviews as well as adding to your portfolio, once the website is done and they’re absolutely happy with the results, them leaving you a review on Google will be part of the payment.
Step 10 Ask For Referrals.
Once they’re happy with their website and they’ve left a review, it’s only natural to ask them who else they know that would benefit from getting a website just like this. I recommend you offer a gift card for $50 or even $25 to a local coffee shop as a thank you when people give you a referral that turns into a client.
This not only is a nice gesture, it will also put you in the front of their mind when it comes to referring you again in the future to somebody else.